
So this is a great chocolate cake recipe. It’s rich and has a great texture. It can be used for any occasion and I decided to bake it, cut out a shamrock shape x 2 and decorate with shades of green buttercream. It’s a fun thing to try and worked well because of the shamrock shape and colour variations.
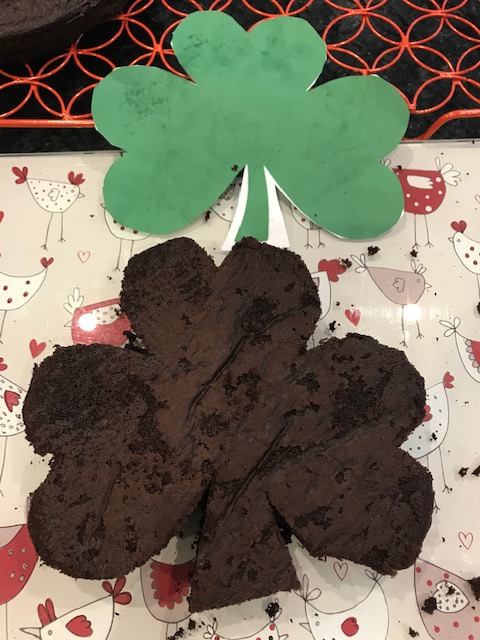
I made the cake in two 8″ / 20 cm round tins. Then found a shamrock image on the web, sized it, printed it and cut it out of the cooled cakes. If you can draw freehand, go for it! I would recommend gel dye colour rather than a liquid one. Start with a small bit for the first shade, then increase the quantity to get a deeper colours as you go.
As I was saying, you don’t have to cut this cake into any particular shape. Just leave it as two round 20cm chocolate cakes and decorate any way you like. Lots of raspberries and strawberries mixed with a flavoured cream, maybe Baileys, would be just delicious too!
I’ll write out the Buttercream recipe at the bottom of the cake recipe and method.
Prepare your baking tins by lining the base with parchment and using some butter or oil to grease the sides of each tin.
Ingredients:
210g Plain Flour
1 tsp salt
1 tsp Baking Powder
2 tsp Bicarbonate of soda
80g Cocoa Powder
200g caster sugar
2 tsp Vanilla Extract
2 large eggs
112g Vegetable Oil
240g Buttermilk
235g freshly made coffee
Preheat oven to 175C – Fan oven
Method:
In a large bowl sift together the flour, sugar, cocoa powder, baking powder, bicarbonate of soda and salt and mix with a whisk.
In a medium bowl, add the buttermilk, oil, eggs and vanilla extract and whisk together.
Using an electric mixer and setting it on low, slowly add the wet ingredients to the dry ones. Just add bit by bit until it’s all combined.
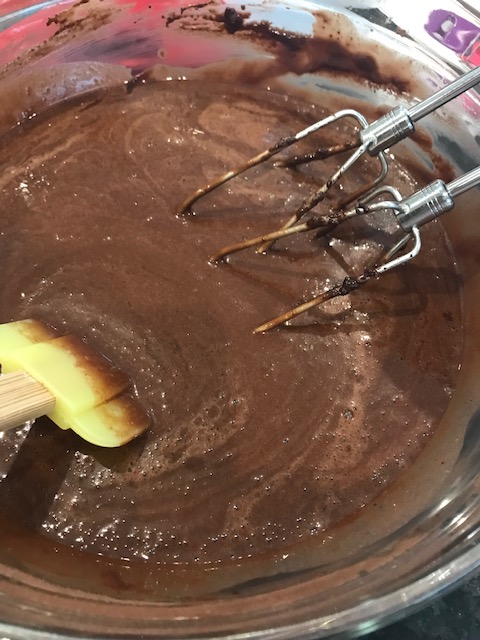
Next, keep the mixer set on low and add the coffee. Stir to combine it making sure to scrape the bottom of the bowl. Use a spatula to do this. It will be very runny but this is what you’re looking for.
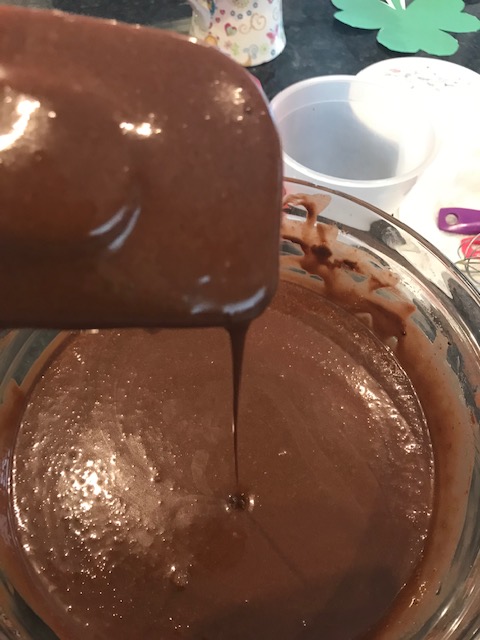
Pour the batter into the two prepared baking tins. I use a ladle to get an even spread and check by weighing the tins so they are about equal weight.
Bake for 35 minutes and check with a cake skewer. It should come out clean. If it’s not baked, add another 5 minutes. The cake skewer should not come out wet.
Leave to cool in the baking tin for 30 minutes before removing them and let them sit on a cooling rack until they are completely cold.
They may come out of the oven with quite a dome but this will mostly flatten down as the cakes cool.
I printed out a shamrock stencil and used this to cut out my shapes. Try to have a wide central piece so the cake holds once decorated. I also made the shamrock stem wider.
Buttercream Recipe:
To have enough buttercream to play around with, I doubled my usual recipe below and had more than enough to fully decorate both layers but it’s up to you.
140g soft unsalted butter
280g icing sugar
1 – 2 tbsp milk
1/2 tsp vanilla paste or extract
Place the butter in a large bowl and beat well until it’s really soft and light. Add half the icing sugar and beat again until it’s smooth.
Next add the remainder of the icing sugar and 1 tbsp of milk and beat again. You may need to add another 1/2 tbsp of milk to get a really smooth and creamy consistency.
Finally add the vanilla paste/extract and beat again. You will have a lovely smooth buttercream icing.
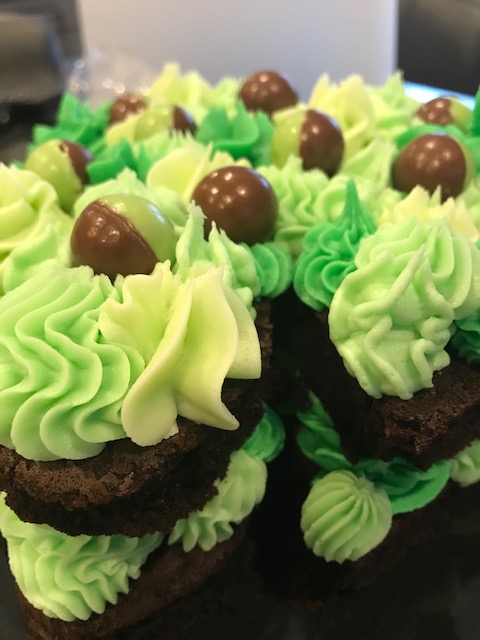
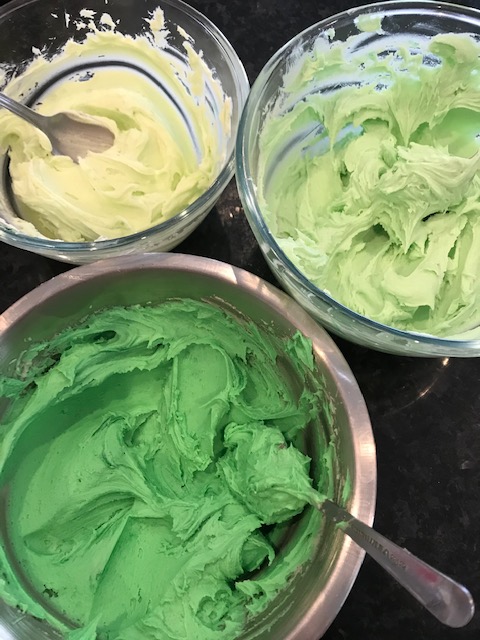
I split the buttercream into 3 bowls and used a green gel dye to colour each one. Use a small amount (a toothpick is handy) and mix well. In the next bowl add a little more and then the 3rd bowl, more again till you get the increased shades of the same green colour.
Pick a selection of small and large piping nozzles with different designs, spoon the dyed buttercream into piping bags and you’re ready to be creative!
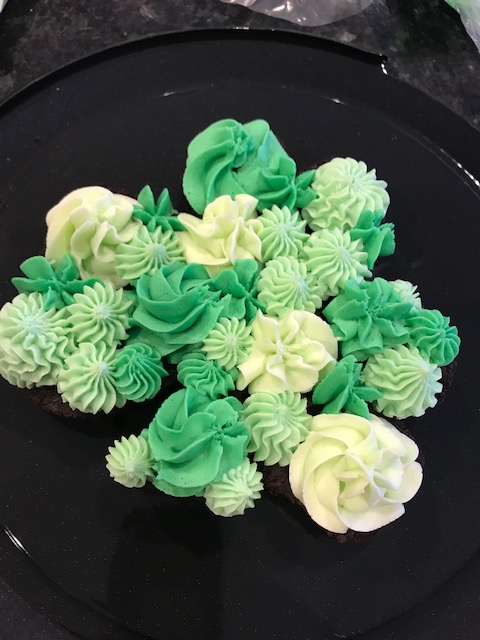
Pipe away to your heart’s content on the first layer of your shamrock. You can mix the patterns and colours around the bottom layer but just make sure to have a nice variation along the edges where they will be seen. This is the bottom layer of my cake:
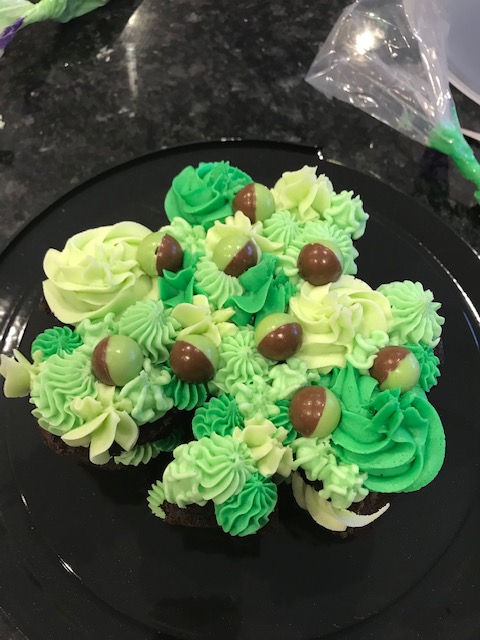
Next gently place the second shamrock cake piece on top of this and very gently press down a little bit. Then start piping again on the top layer to get a contrast of shapes and sizes.
I added some Aero Chocolate Mint balls for a final decorating finish.
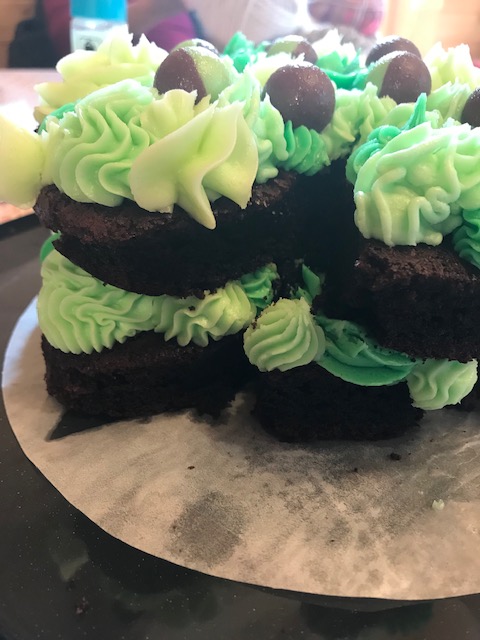
You can see the different shades of green and the different shapes from the side. It’s a lovely centre piece and worth making for the one day a year 🙂
Of course you don’t have to decorate the same way as here. One piping bag with a fancy nozzle and lovely swirls will be just as appreciated and enjoyed as anything here. I do like the different tones of the one shade. It does work well but again, do what you like best.
Bake with Irish love
Soraya x